Information book |
Front Office ![]() Office
Office ![]() Information Book
Information Book
|
Contents Hide |
The information book allows you to save phone numbers, addresses and related documents.

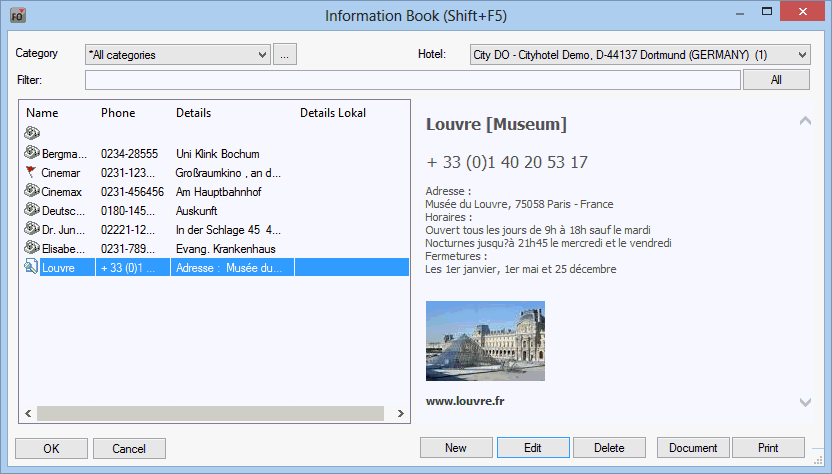
Click the Category drop-down list to view a specific category or all categories at once.
MPE installations provide a “Hotel” drop-down list that allows you to selectively view the records for one specific hotel or all hotels.
The filter allows you to search the list for specific words. Enter the word you want to search for and click inside the list area. This reduces the list to records that match the search. You can click the [ button at any time to disable the filter and view all records.
Select a record in the list to view its details in the right window pane.
To create a new record, click the [ button.

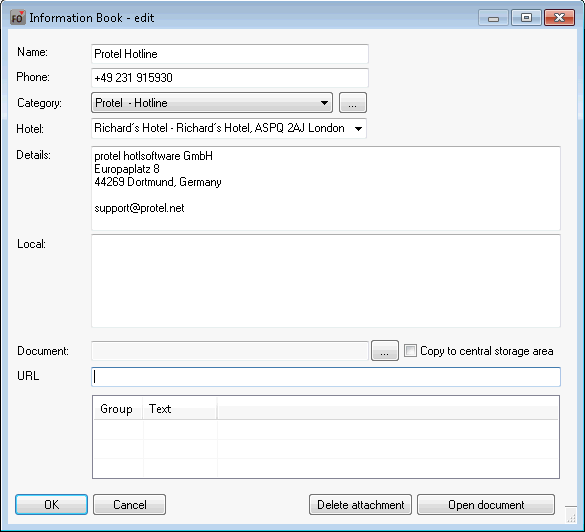
Name and Phone: Enter the name and phone number of the contact in these text boxes.
Category: Select a category for the record.
Hotel: Select the hotel for which the record should be visible (MPE only). Read the section below for information on how to create a new category.
Details: Use the “Details” text box to enter additional information such as address, fax number etc. as required.
![]() Local
Local![]() (from version 2013.17.000): You can add additional text in a local language (with a different character code).
(from version 2013.17.000): You can add additional text in a local language (with a different character code).
Document: You can add a file for the contact. To do so, click the button next to the “Document” box and navigate to the relevant document. Make sure to save this document in the “Scanner” folder of the protel directory so that all users can access the document from any workstation. Highlight the document and select the ![]() Copy to central storage area check box. This saves an additional copy of the document to the “Infobook” folder of the protel directory. Click or as required to open the attached file or delete the attachment, respectively.
Copy to central storage area check box. This saves an additional copy of the document to the “Infobook” folder of the protel directory. Click or as required to open the attached file or delete the attachment, respectively.
A flag icon (![]() ) indicates records with an attached text document. The
) indicates records with an attached text document. The ![]() icon indicates an attached image file.
icon indicates an attached image file.
URL: You can use the “URL” box to enter an Internet address for the contact.
![]() Display of user defined codes (Group / Text)
Display of user defined codes (Group / Text)![]() (from version 2013.17.000): The table shows user defined codes which have been added as "udf type 5500 - Information book" (System data > Reservation > User defined fields and codes > User defined fields).
(from version 2013.17.000): The table shows user defined codes which have been added as "udf type 5500 - Information book" (System data > Reservation > User defined fields and codes > User defined fields).
Click the button at the top of the dialog box (next to the Category pull-down list) to create a new category:

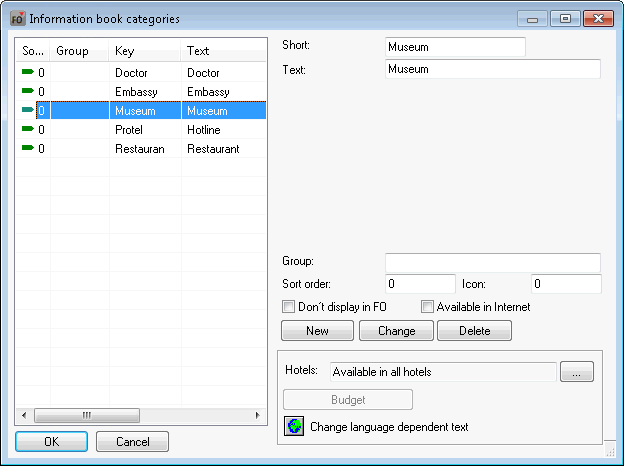
This opens a window in which you can enter the name, an abbreviation and a group for the category. You can use the “Sort order” field value to determine the order in which the items are displayed:

![]() Don't display in FO: If you select this check box, records of this category cannot be accessed by members of the Front Office department
Don't display in FO: If you select this check box, records of this category cannot be accessed by members of the Front Office department
![]() Available in Internet: If you select this check box, records of this category will also be visible through the WBE (Web Booking Engine) where installed.
Available in Internet: If you select this check box, records of this category will also be visible through the WBE (Web Booking Engine) where installed.
Finally, click the [ button to create the category. The new category appears in the list on the left.
You can click the [ button to edit existing records: To do so, highlight the record you want to edit, make the required changes and click the button.
The [ button allows you to remove existing categories.