
Content Hide
Open the arrival list by selecting the respective symbol in the menu.
The arrival list first shows the search mask. There you can select the time-span for which you would like to view the arrival.
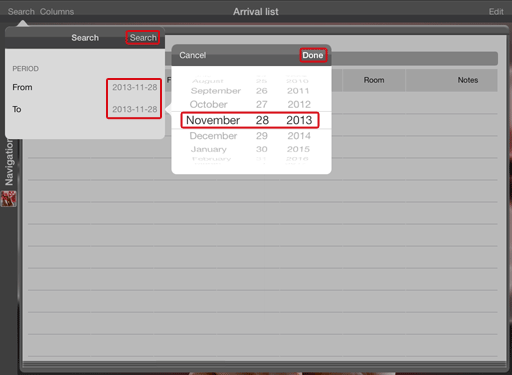
The current protel date is always saved as the default value. Tap the date to change it and confirm it with [Done].
Afterwards, start the search using [Search]. The list will then show you all of the results for the entered time-span.
You can also additionally search within the results of the search.
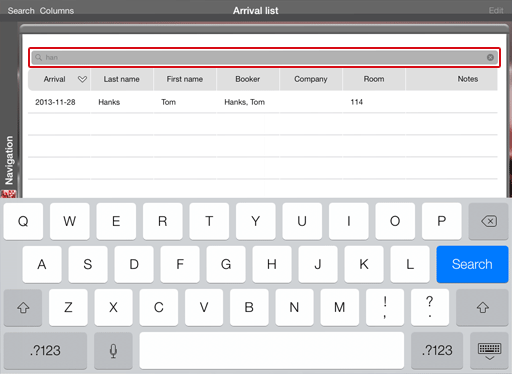
In the search bar above, tip on one of the keywords, the booking number, or parts of it and the list will be directly filtered afterwards.
The arrivals are sorted as default based on the contents of the first column (in this case the arrival date).

If you would like to sort another column based on the value, tap the column’s header. The column symbol with arrows pointing up or down will tell you whether the contents of the column are sorted as rising or falling.
In order to adjust the view, tap [Columns] located in the upper left.
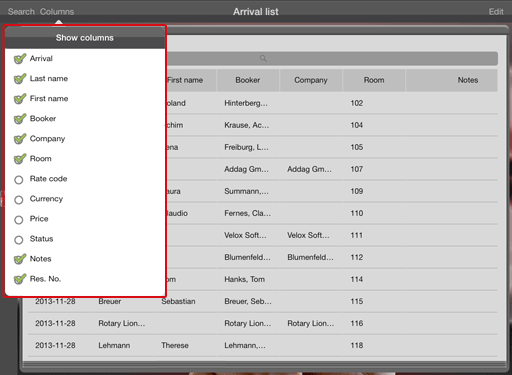
Set a check mark to all the columns which you would like to fade-in. By deactivating a check box, the column will be faded-out.
You have various possibilities for editing in the arrival list. To edit an arrival, simply tap the arrival in the list. Depending on which column entry you tap on, the booking menu will open with the respective tab.
If you tap the arrival date of the room number, the booking menu will open containing the “Reservation” tab.
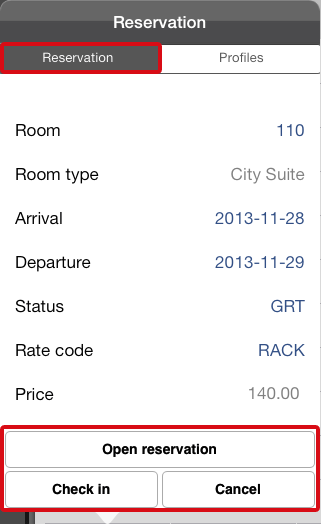
The buttons in the booking menu below offer you various editing options. You can also edit all of the values of the reservation that are in blue by tapping it.
When tapping on the name of a guest in the list, a reservation menu with the “Guests” tab will open.
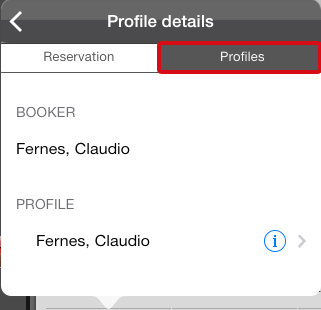
Via the reservation menu, you can access additional information about the guest and the guest profile.
In order to be able to edit more than one departures, place the entire arrival list into edit mode.

Tap on [Edit]. In doing so, an additional column with check boxes will be inserted.
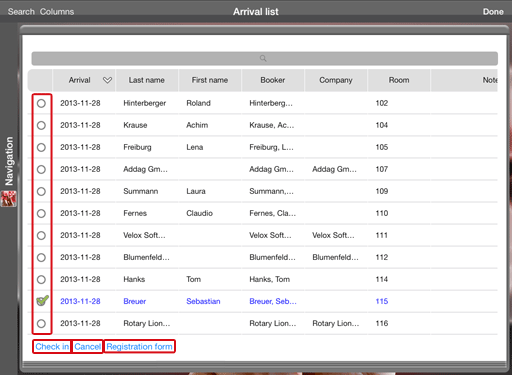
Select one or more reservations and execute the check-in by using the button at the bottom edge of the list or by cancelling a reservation by using the [Cancel] button, should the guest have cancelled.
After editing, tap [Done] located in the bar at the top right.
You also have the possibility of creating a registration form if you have set the list to edit mode. We recommend that you create a registration form while the guest is present so that he can directly sign it.
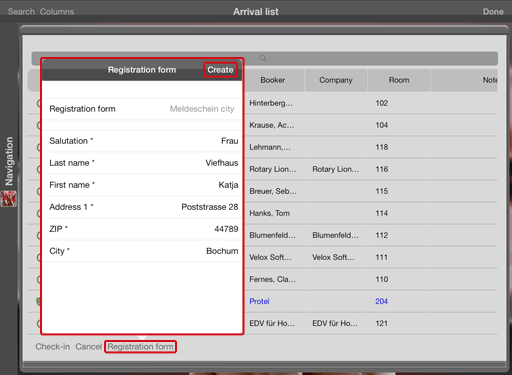
Select a guest and tap [Registration form]. An overview containing the guest data appears; it also enables you to create a registration form as a PDF document.
Tap [Create] and the digital registration form will appear.
![]()
Tap [Sign] and give the iPad to the guest. The guest can sign the registration form directly on the iPad by using his finger or a touch-pen.
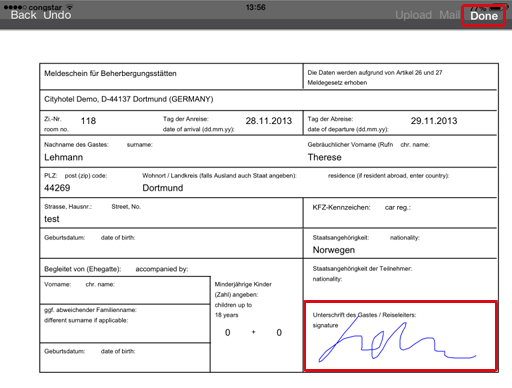
Save the signed registration form by tapping [Done].
You can then simply upload the signed registration form via [Upload] to the letters of the protel guest profile or send the registration as an email in the form of a PDF.

Tap on [Upload]. After the registration form has been successfully uploaded into the letters, you will receive the following confirmation message:
If you tap [Mail] to send the registration form as an email, a new email will appear on the iPad with a PDF registration form as attachment.
The registration form can also be created for each reservation via the “More” menu. All of the central functions are always at the tips of your fingers whenever you need them.