 “Group members/Group master” button]
Group members/Group master |
[Navigator  “Group members/Group master” button]


|
|
When you open the Navigator for a group member, clicking the [ button opens the group master Navigator.
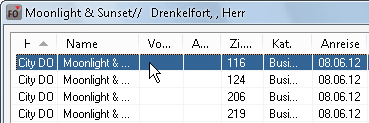
Click the [ button to view the list of all group members.

Right-click the individual entries to open the Navigator for each reservation.
An overview of the entire reservation is provided in the lower right:
#Conf: Number of confirmed reservations
#Cancel: Number of canceled reservations
# Adults: Total number of persons
#1 Adults.: Number of one person rooms
#2 Adults: Number of two person rooms
#3 Adults: Number of three person rooms
# Rooms: Total number of rooms
#Children: Number of children
You use the following buttons to edit one or more reservations:
|
Add |
Shows additional reservation data relating to the selected reservation. |
|
Grp. Profile |
Used to undo rooming assignments (see Rooming list); in other words, clicking this button resets the name of the group member selected to the group master profile! |
|
|
Select a guest and click this button to access Room allocation. The selected reservation can then be assigned to a room. This is the preferred means of allocating individual rooms for newly created group reservations. |
|
|
If you want to add a new reservation to the group reservation, click this button to access the Reservation dialog box. Group-related data, such as the group name, for example, are displayed automatically. |
|
|
If one of the rooms for the group is canceled or not all of the rooms on the rooming list are requested, you can access this dialog box to void the room(s) directly. Voided rooms remain in the list as evidence of the original number of rooms from the group member list, which would be required if charging for cancellations. |
|
|
For adding existing reservations to a group. Clicking this button opens a list of all the reservations that lie within the reservation period of the group master. To add reservations to this group, select the required reservation and click to confirm. You will then be asked whether you also want to transfer the payment/routing instructions, fixed charges, and the rate by day grid. Since these can be created individually in the reservations, you should choose a reservation that contains the appropriate entry (sample reservation). |
|
|
Use this button to remove individual reservations from the group. The removed reservation(s) will still exist. First select the reservations you want to remove and then click the button. You will then be asked whether you want to delete any existing payment/routing instructions. |
|
Reactivate |
Reactivates a voided reservation. |
In the “Group members” dialog box, you can assign individual guests to the group reservation. Guest names can be entered in the rooming list, which is useful for group reservations involving 30 rooms, for instance, because you do not then need to open the Navigator for each individual guest.
|
|
Double-click the first entry in the list to open the Navigator for the associated reservation.

The Navigator opens in “Change name” mode:

To change the name, overwrite the entry in the “Name” box.
Click [ to launch the guest search and display the search results. If this name does not exist, the new guest profile dialog box appears. If different reservation data exist within the group, the arrival and departure dates can be changed in the “Reservation” pane.
To go to the next group member, click the page down key on your keyboard  .
.
Repeat steps 1-4 until you have entered a name or assigned a profile for every group member.
|
|
Available user rights |
|
|
380 |
FO Group naming list name |
Controls access to the “Rooming list” function. |