Reservation Sharer reservation
Sharer reservation |
Front Office Reservation Sharer reservation
|
|
A “sharer” reservation is one for which several guests share a room but each guest requires a separate invoice. For example, this is the case when two colleagues share a room, both addresses are recorded and a separate invoice must be created for each. The sharing parties may even have different arrival and departure dates, rate codes and rates.
A sharer reservation may be made as follows: When you create a new reservation in the Reservation dialog box, or by entering the required information in the Navigator if the reservation already exists. In both case, click the Sharer button.  .
.
A sharer reservation is treated the same way as a single reservation in protel. This allows you to enter different details for each sharer. Sharer reservations appear as single reservations in reports such as Arrivals, Departures, and Reservations which allows you to also search by guest name.
The company is automatically assigned to every allocated sharer reservation for Company reservations. One room can have up to six sharers. Sharing is not available for reservations with room changes.
The number of shared rooms that appear in the Housekeeping report corresponds to the number of sharer reservations. The hotel status counts the rooms and guests even if the arrival and departure days of sharer reservations are different.
Shared reservations in the room plan are indicated by a [+] sign and the number of sharers.

 Version 2015.19.200 from 30.07.2015
When generating a sharer, the rate information will be automatically taken from the original reservation and transferred to the sharer (rate and/or rate adjustments from the RBD).
|
|
Available settings |
|
protel automatically adopts the company profile from the main reservation when newly generating a sharer. The automatic adoption of the company profile can be suppressed upon request.
|
|
|
|
Available user rights |
|
|
96 |
FO Sharer input |
Allows the user to enter a sharer for a reservation. |
To enter sharers when creating a new reservation, click [ in the Reservation dialog box.
, the “Sharers for” dialog box appears. You can enter the guest name in this dialog box.
Enter the first letter of the guest's surname. Then press the TAB key or click the button. The “Search Result” window appears.
Double-click the respective name or select the name and click [. Click [] to create a new guest.
Once you have selected an existing guest or created a new one, the “Sharers for” dialog box appears again. You can enter up to five additional names.
Once you have entered all of the sharer names, click [. In the Reservation dialog box click [ to confirm the reservation. The “Sharer / input rate” dialog box appears.
All room sharers are now displayed.
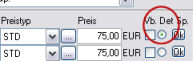
You can change and monitor the rate code, rate and the number of guests for each reservation. If you want to change the actual rate amount, you must select the  Special rate check box for verification.
Select the RI check box to specify which guest will be responsible for the payment of all bookings made by the other sharers (e.g. one sharer books a spa treatment). The booking will then be filed with the guest assigned the RI tag.
Click []. You will be prompted to indicate whether the accounts of all sharers should be diverted to this guest.
|
NOTE:
Click [. Enter the names of the sharers as described above. |
Sharers are created for existing reservations using the Navigator. They can also be created even if a room has not been allocated.
In the Navigator, click []. The Reservation dialog box appears in which the arrival, departure, category, room number, rate code and rate have been copied from the original reservation.
You can change the suggested arrival and departure dates as required.
Enter the guest name and click to confirm the reservation information.
The Sharer / input rate dialog box appears. Proceed as described in the section “Creating sharers in the Reservation dialog box.”
Click [ to confirm your entry and return to the Navigator of the original reservation.
Sharer reservations are indicated in the room plan by a plus sign (+) shown in the arrival and departure section of the window. The number of sharers is shown in brackets in front of the guest name.

If the arrival and departure dates of the sharers in the reservation differ, the first arrival data and the last departure date will be shown. The tooltip will expand automatically when you move the mouse over a sharer reservation.
Right-click a sharer reservation to open the sharer list containing the names and reservation data of the sharers.
Now right.click to open the Navigator of the respective guest.
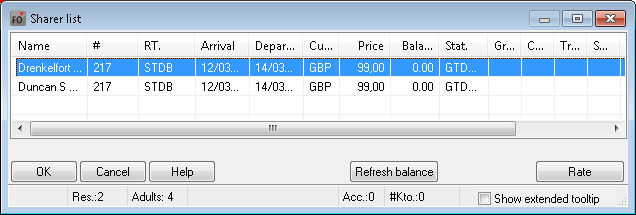
Double-click a sharer to open the Double-click menu. This menu contains additional options such as cancellation, etc.
To open the Sharer / input rate dialog box, click [.
You can summarize two single reservations as one sharer reservation.
You can combine two complete reservations for the duration of a stay () or combine two rooms during the second night of a particular stay, for example ().
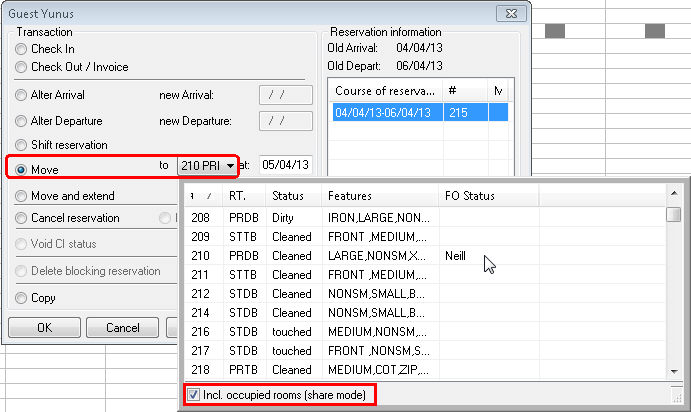
In the Room plan (or Inhouse list or Reservation list), double-click the reservation that you want to move to another occupied room. The Double-click menu opens.
Select the  Move radio button.
The selection list appears. Select the  Incl. occupied rooms (share mode) check box.
In the drop-down list, select the room to which the reservation should be moved.
![]()